This guide shows how to draw Hello Kitty in seven steps using simple shapes: an oval for the head, small ears, a face, a bow, a body, an outfit, and color. Most steps have a picture, and a video tutorial is included below. It suits beginners and children drawing with an adult.
Hello Kitty is a Sanrio character. ColoringPagesOnly is not affiliated with Sanrio, and this tutorial is a fan guide for learning to draw. See the copyright notice for how the site treats characters.
What You Need
- A clean sheet of white paper
- A pencil and an eraser
- A black fine liner or marker for the outlines
- Colored pencils, markers, or crayons
- Optional: a white gel pen for small highlights
About the Character
Sanrio’s company profile gives these facts: her name is Kitty White, she was designed in 1974, her birthday is November 1, and she was born in the suburbs of London, England. Sanrio also says she wears a ribbon on her left ear. That detail matters for the drawing, because the bow sits on one side of the head and not in the middle.
How to Draw Hello Kitty Step by Step
Step 1: Draw the Head
Lightly sketch an oval that is a little wider than it is tall. Use a pencil with light pressure so you can adjust the shape later.

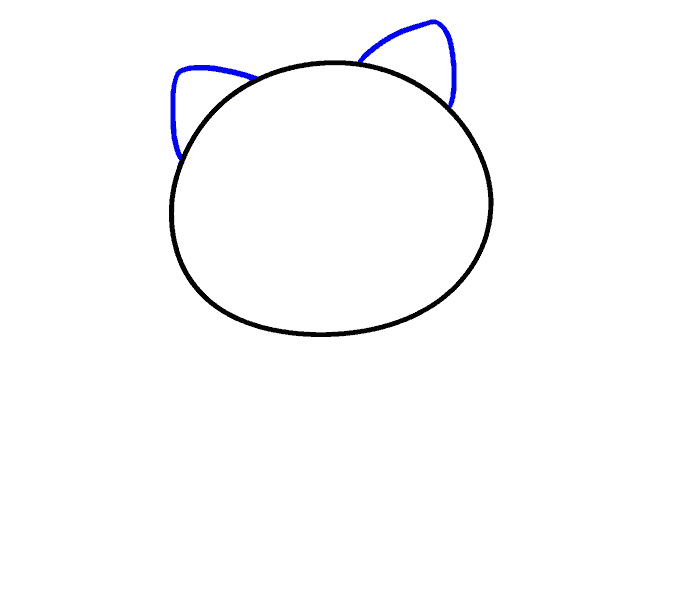
Step 2: Add the Ears
At the top corners of the head, draw two small rounded triangles. Keep them the same size and at the same angle.
Step 3: Draw the Face
Draw two small black ovals for the eyes, set wide apart across the middle of the face. Add a small oval nose between the eyes and a little lower, usually colored yellow. Finish with three short whiskers on each side of the face.
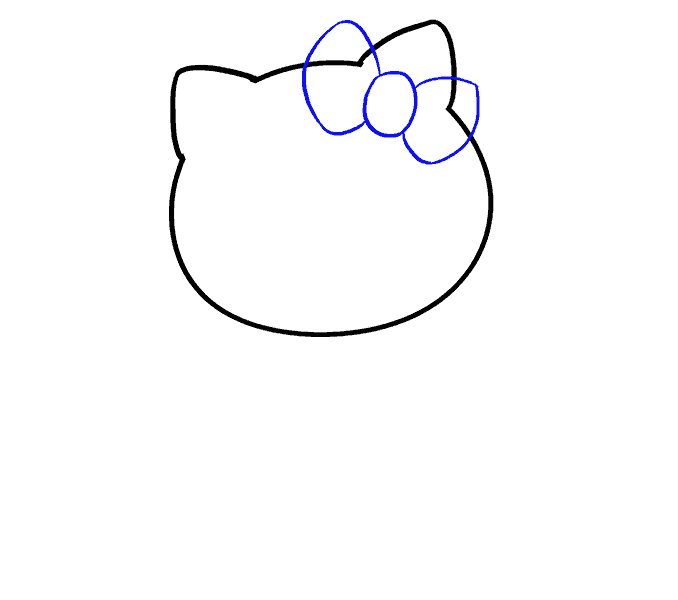
Step 4: Add the Bow
Draw the bow on the ear on the right side of the picture, which is her left ear as she faces you. A simple bow is two rounded loops with a small circle in the middle.
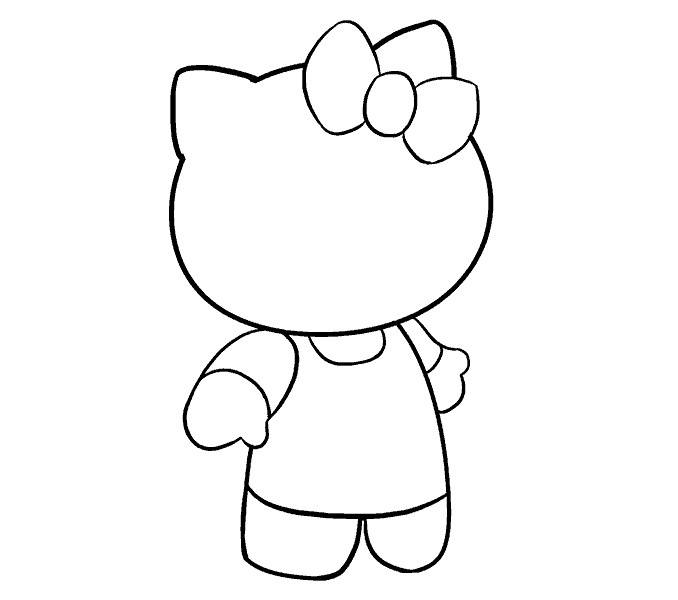
Step 5: Add the Body and Outline
Below the head, add a small rounded body, short arms, and two stubby legs. Then go over the pencil lines with the fine liner. When the ink is dry, erase the pencil marks gently.
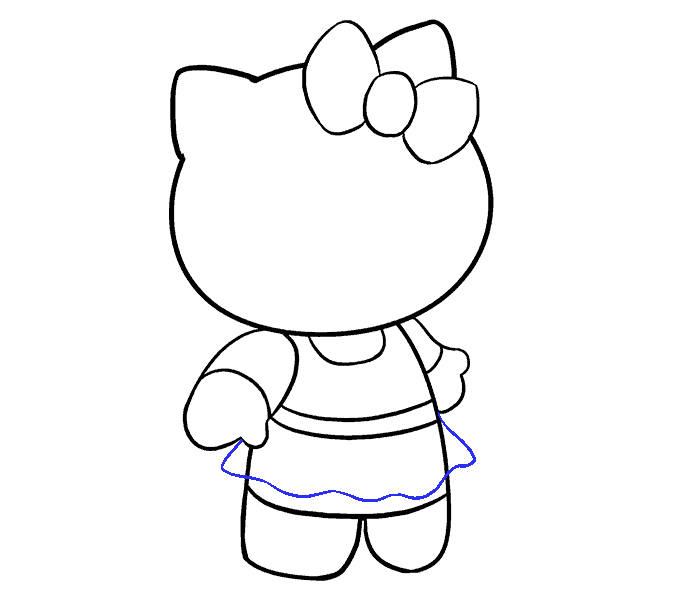
Step 6: Add the Outfit
Draw a simple dress with a round collar. A waistband and a wavy hem, shown in blue in the picture, make the skirt look finished. You can add stripes, dots, or a heart on the front.
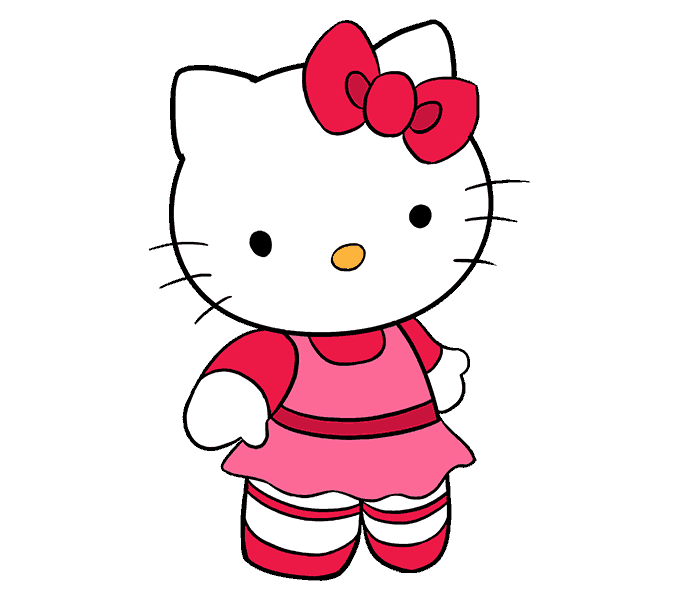
Step 7: Color Your Drawing
Color the drawing last. The classic look has a white face, a red bow, and a yellow nose, and the outfit can be any color. The example below uses a pink dress with red sleeves and a red bow.
Watch the Video Tutorial
For different color schemes, follow the companion guide, how to draw Hello Kitty with various colors.
Tips for a Cleaner Drawing
These are editorial tips from ColoringPagesOnly.
- Draw the first lines in light pencil. Lines that are too dark are hard to erase.
- Use the eyes as a guide. The nose sits between them and a little lower, and the whiskers sit level with the nose.
- Practice the bow on scrap paper first, since it is the hardest shape to get even.
- Try a seasonal outfit once the basic drawing feels easy, such as the Halloween Hello Kitty look.
Color Hello Kitty Pages Next
When you want a ready made outline, browse the Hello Kitty coloring pages or the Hello Kitty Mermaid set. The printing guide explains how to print any page at the right size, and the coloring tips guide covers shading and blending.
Frequently Asked Questions
How do I draw Hello Kitty step by step?
Start with a wide oval for the head, add two small rounded ears, draw the eyes, nose, and whiskers, add the bow on her left ear, sketch a small body, outline it with a fine liner, add a dress, and color it. Each step has a picture above.
What do I need to draw Hello Kitty?
A sheet of white paper, a pencil, an eraser, a black fine liner or marker, and colored pencils, markers, or crayons. A white gel pen is optional for small highlights.
Which ear does Hello Kitty’s bow go on?
Her left ear, according to Sanrio’s company profile. In a picture of her facing you, that is the ear on the right side of the page.
How do I draw Hello Kitty’s face?
Use two small black ovals for the eyes, set wide apart, and a small oval nose between them and slightly lower, usually in yellow. Add three short whiskers on each side.
Where can I find Hello Kitty coloring pages?
The Hello Kitty coloring pages collection has free printable pages, including Halloween and mermaid sets, which can be downloaded as PDFs.
Sources
- Sanrio Company, Ltd., “HELLO KITTY” character profile (name, ribbon on her left ear, design year, birthday, birthplace): https://corporate.sanrio.co.jp/en/business-info/brands/hello_kity/
- Coloring Pages Only, “How To Draw Hello Kitty” (video, YouTube): https://www.youtube.com/watch?v=ZK4_yVSyz0E